Rotted butt joint? Fix it fast.
A simple, secure patch that brings back structural confidence.
About
our company
Our mission is to help homeowners and contractors restore deck safety and strength with a simple, reliable patented repair solution—making it easy to fix bad or rotted butt joints without unnecessary tear-outs, wasted materials, or expensive rebuilds.
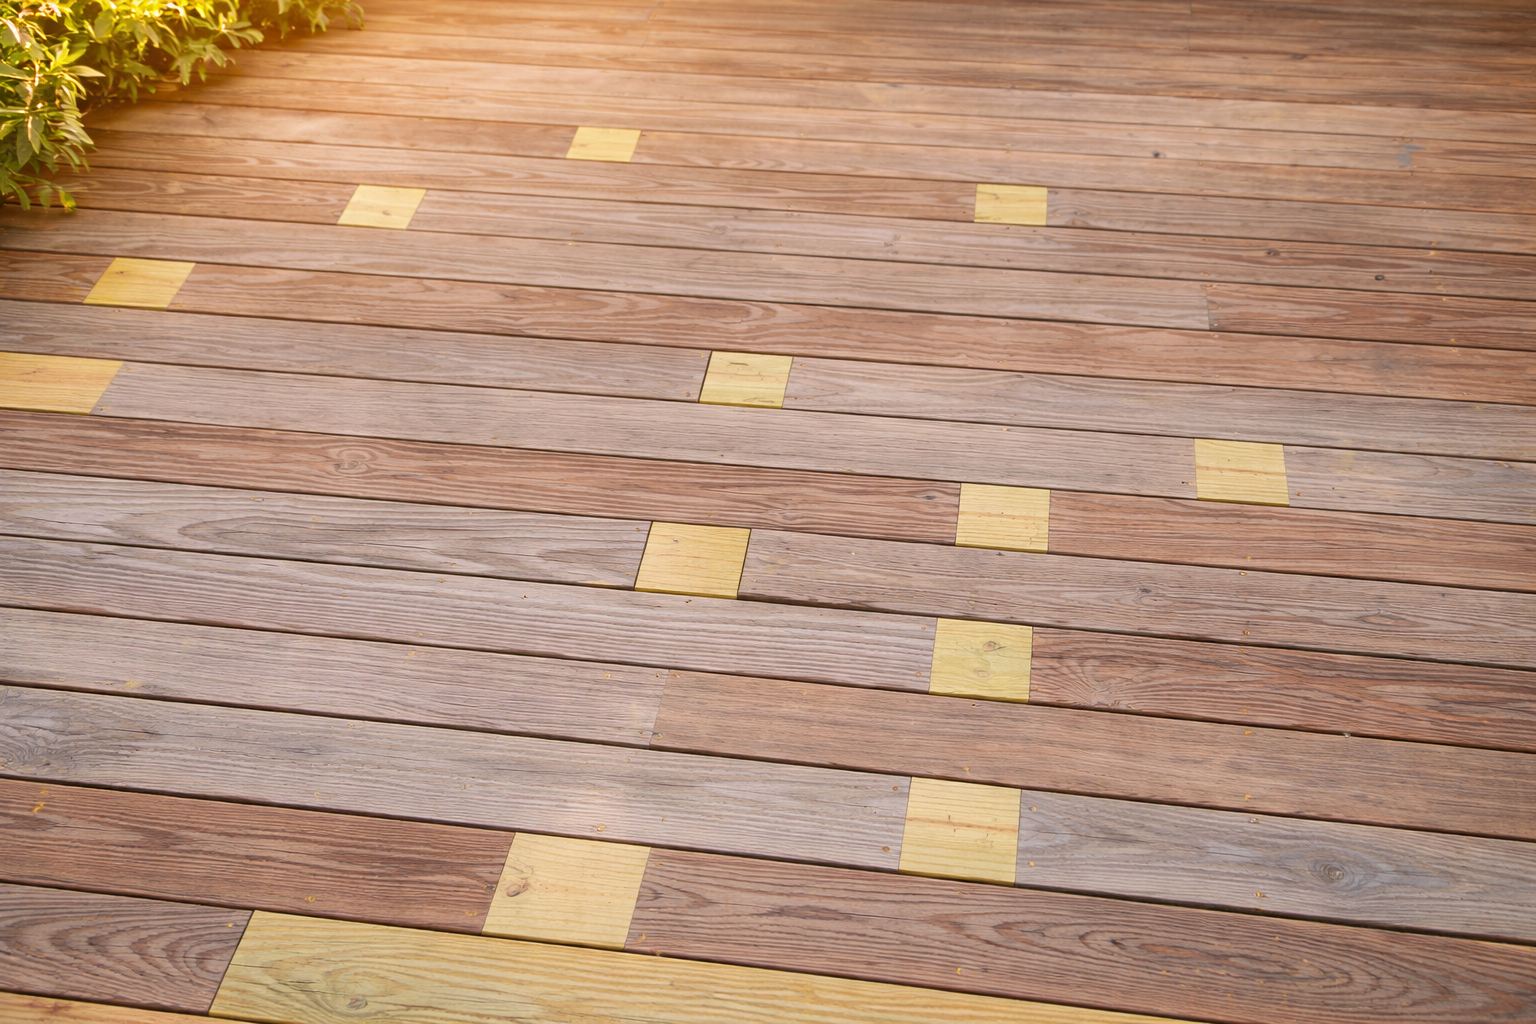
Rebuild the Joint. Not the Deck.
Lift and remove the boards, saddle the patented Deck Repair Patch Block over the existing joist and fasten, trim damaged boards to size, then re-fasten both boards for a strong, secure repair—without a full tear-out.
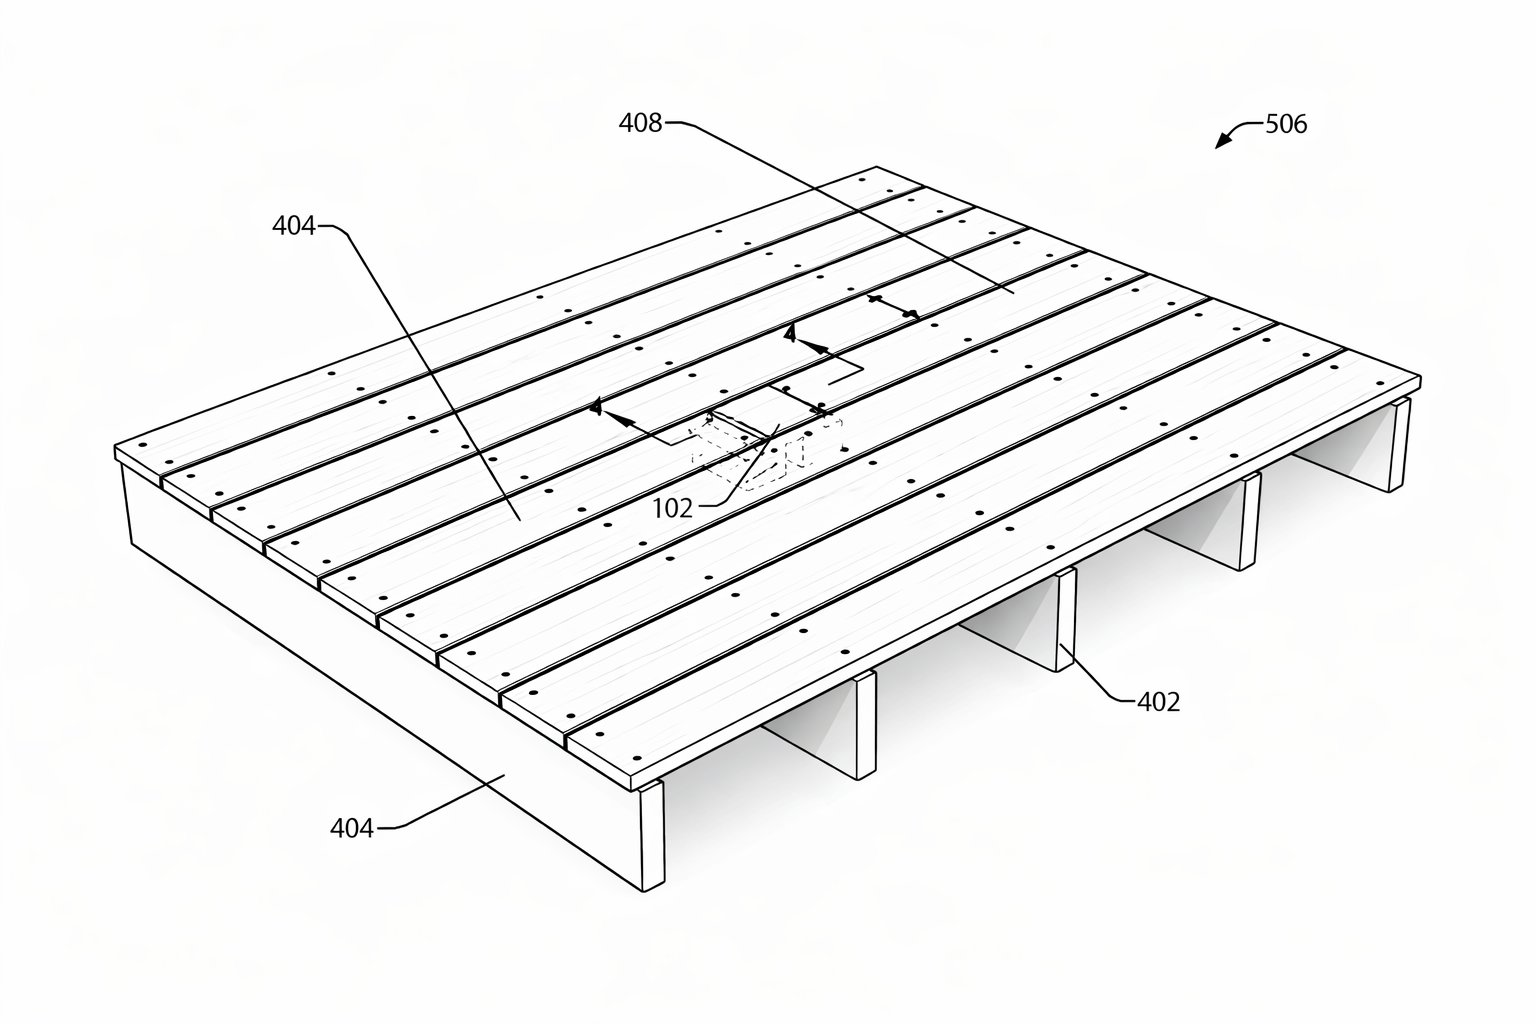
How To Install The Patch Block
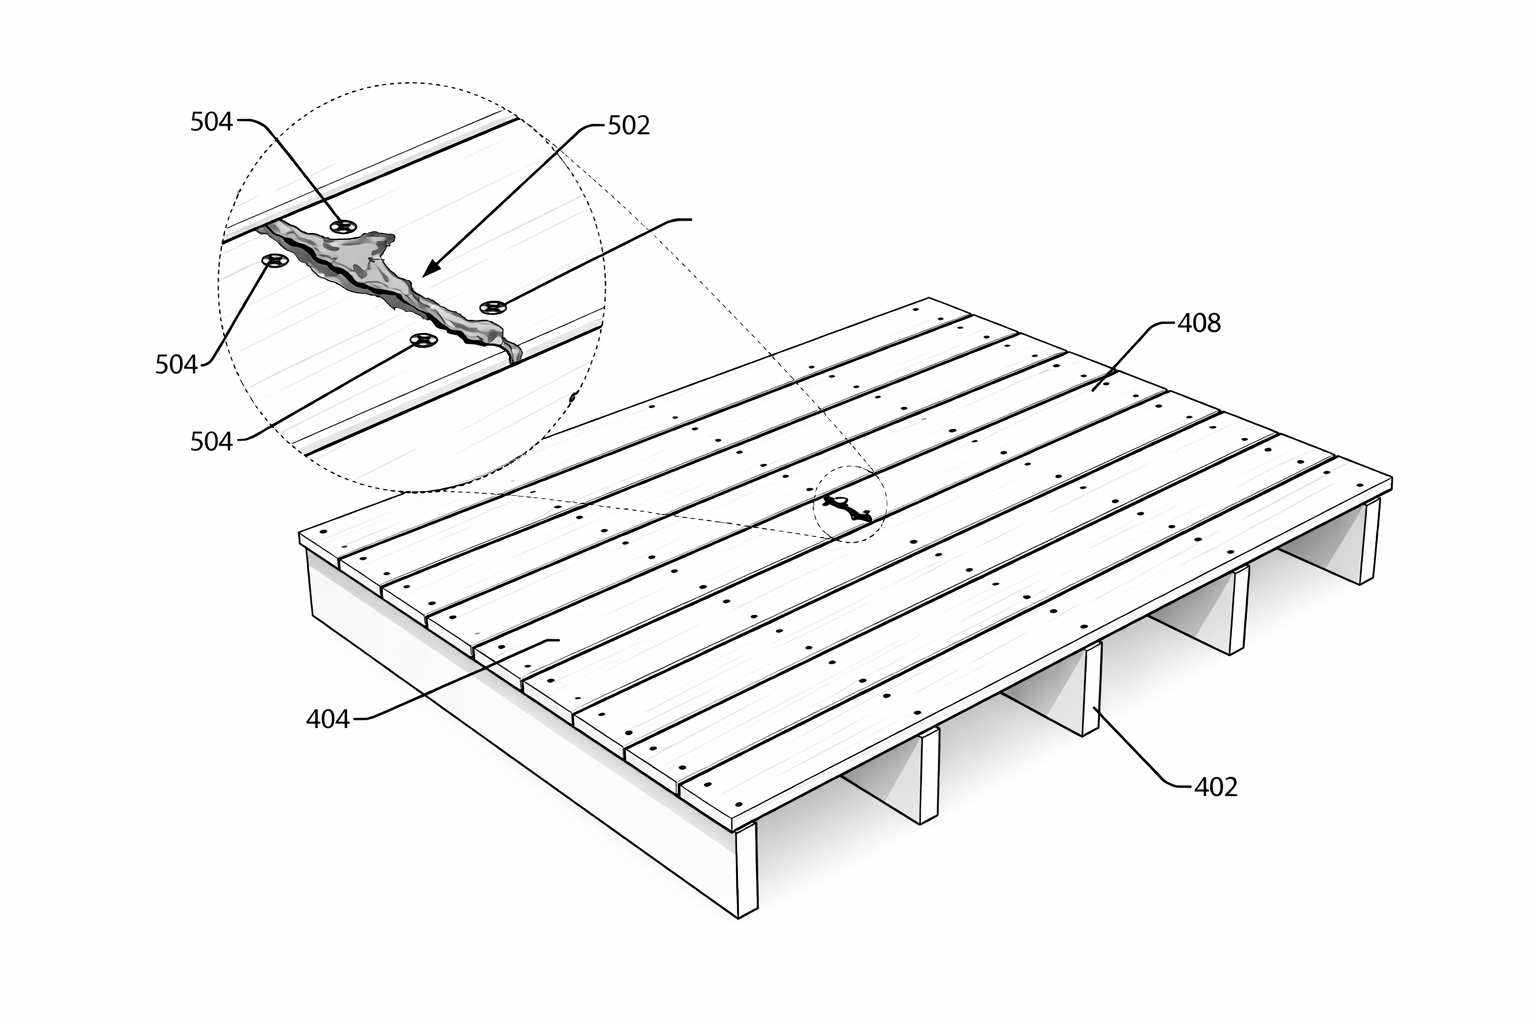
1. Locate the Repair Area
Identify the rotted, loose, or failing butt joint that needs to be repaired.
2. Remove the Damaged Boards
Remove boards of the damaged joint and prepare for installation.
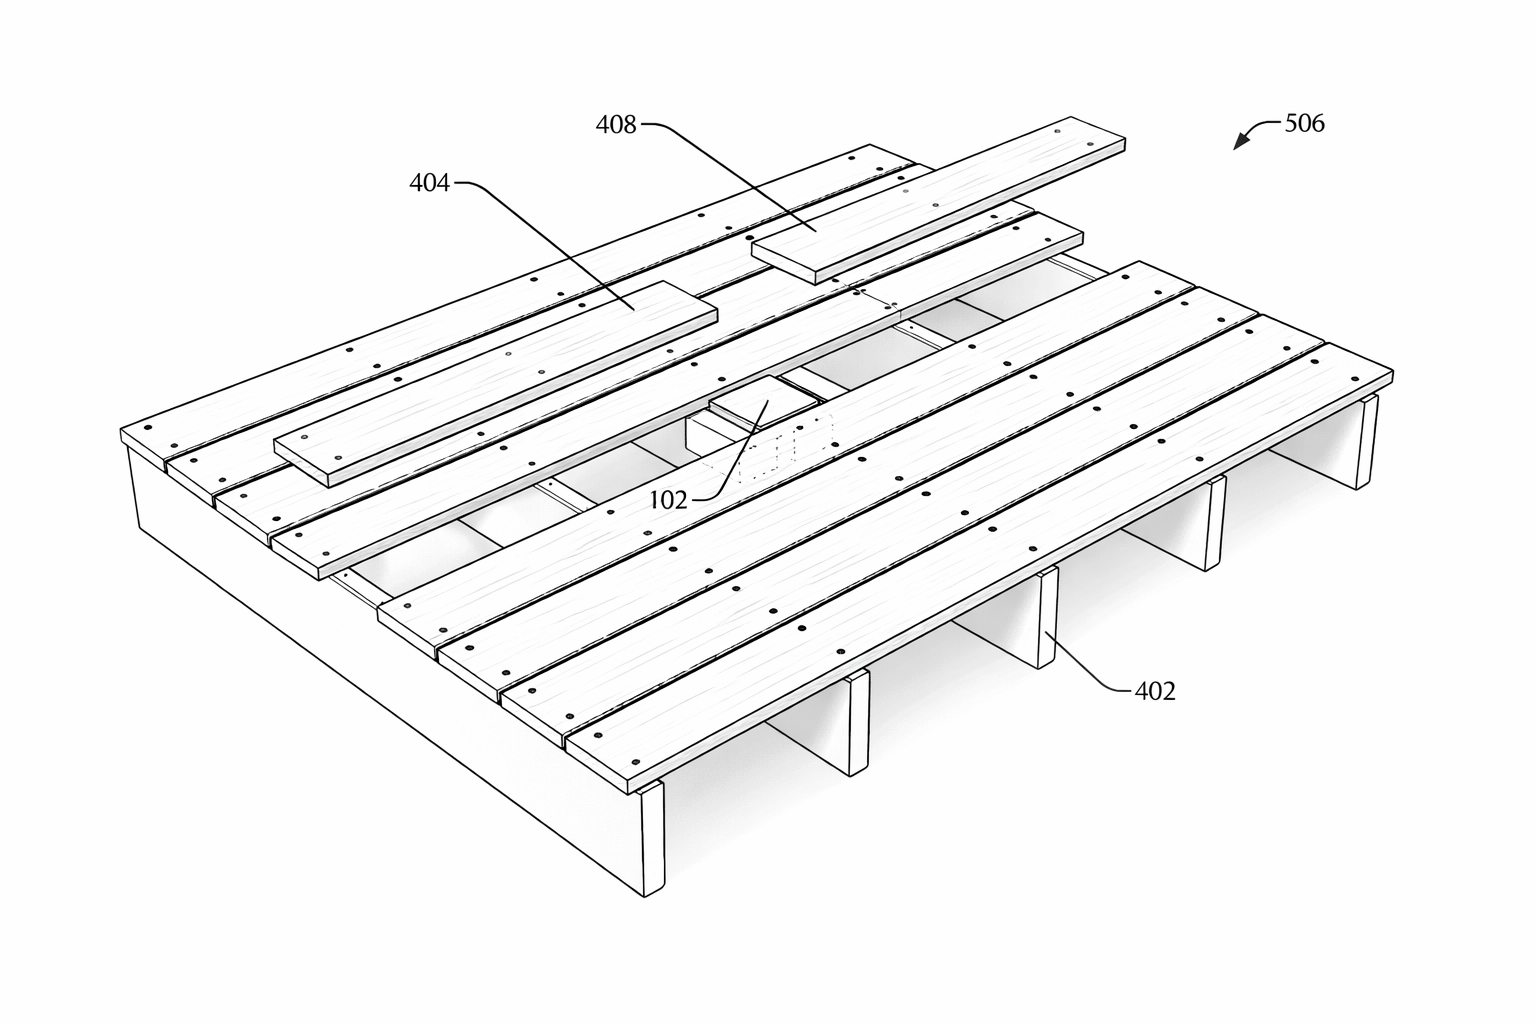
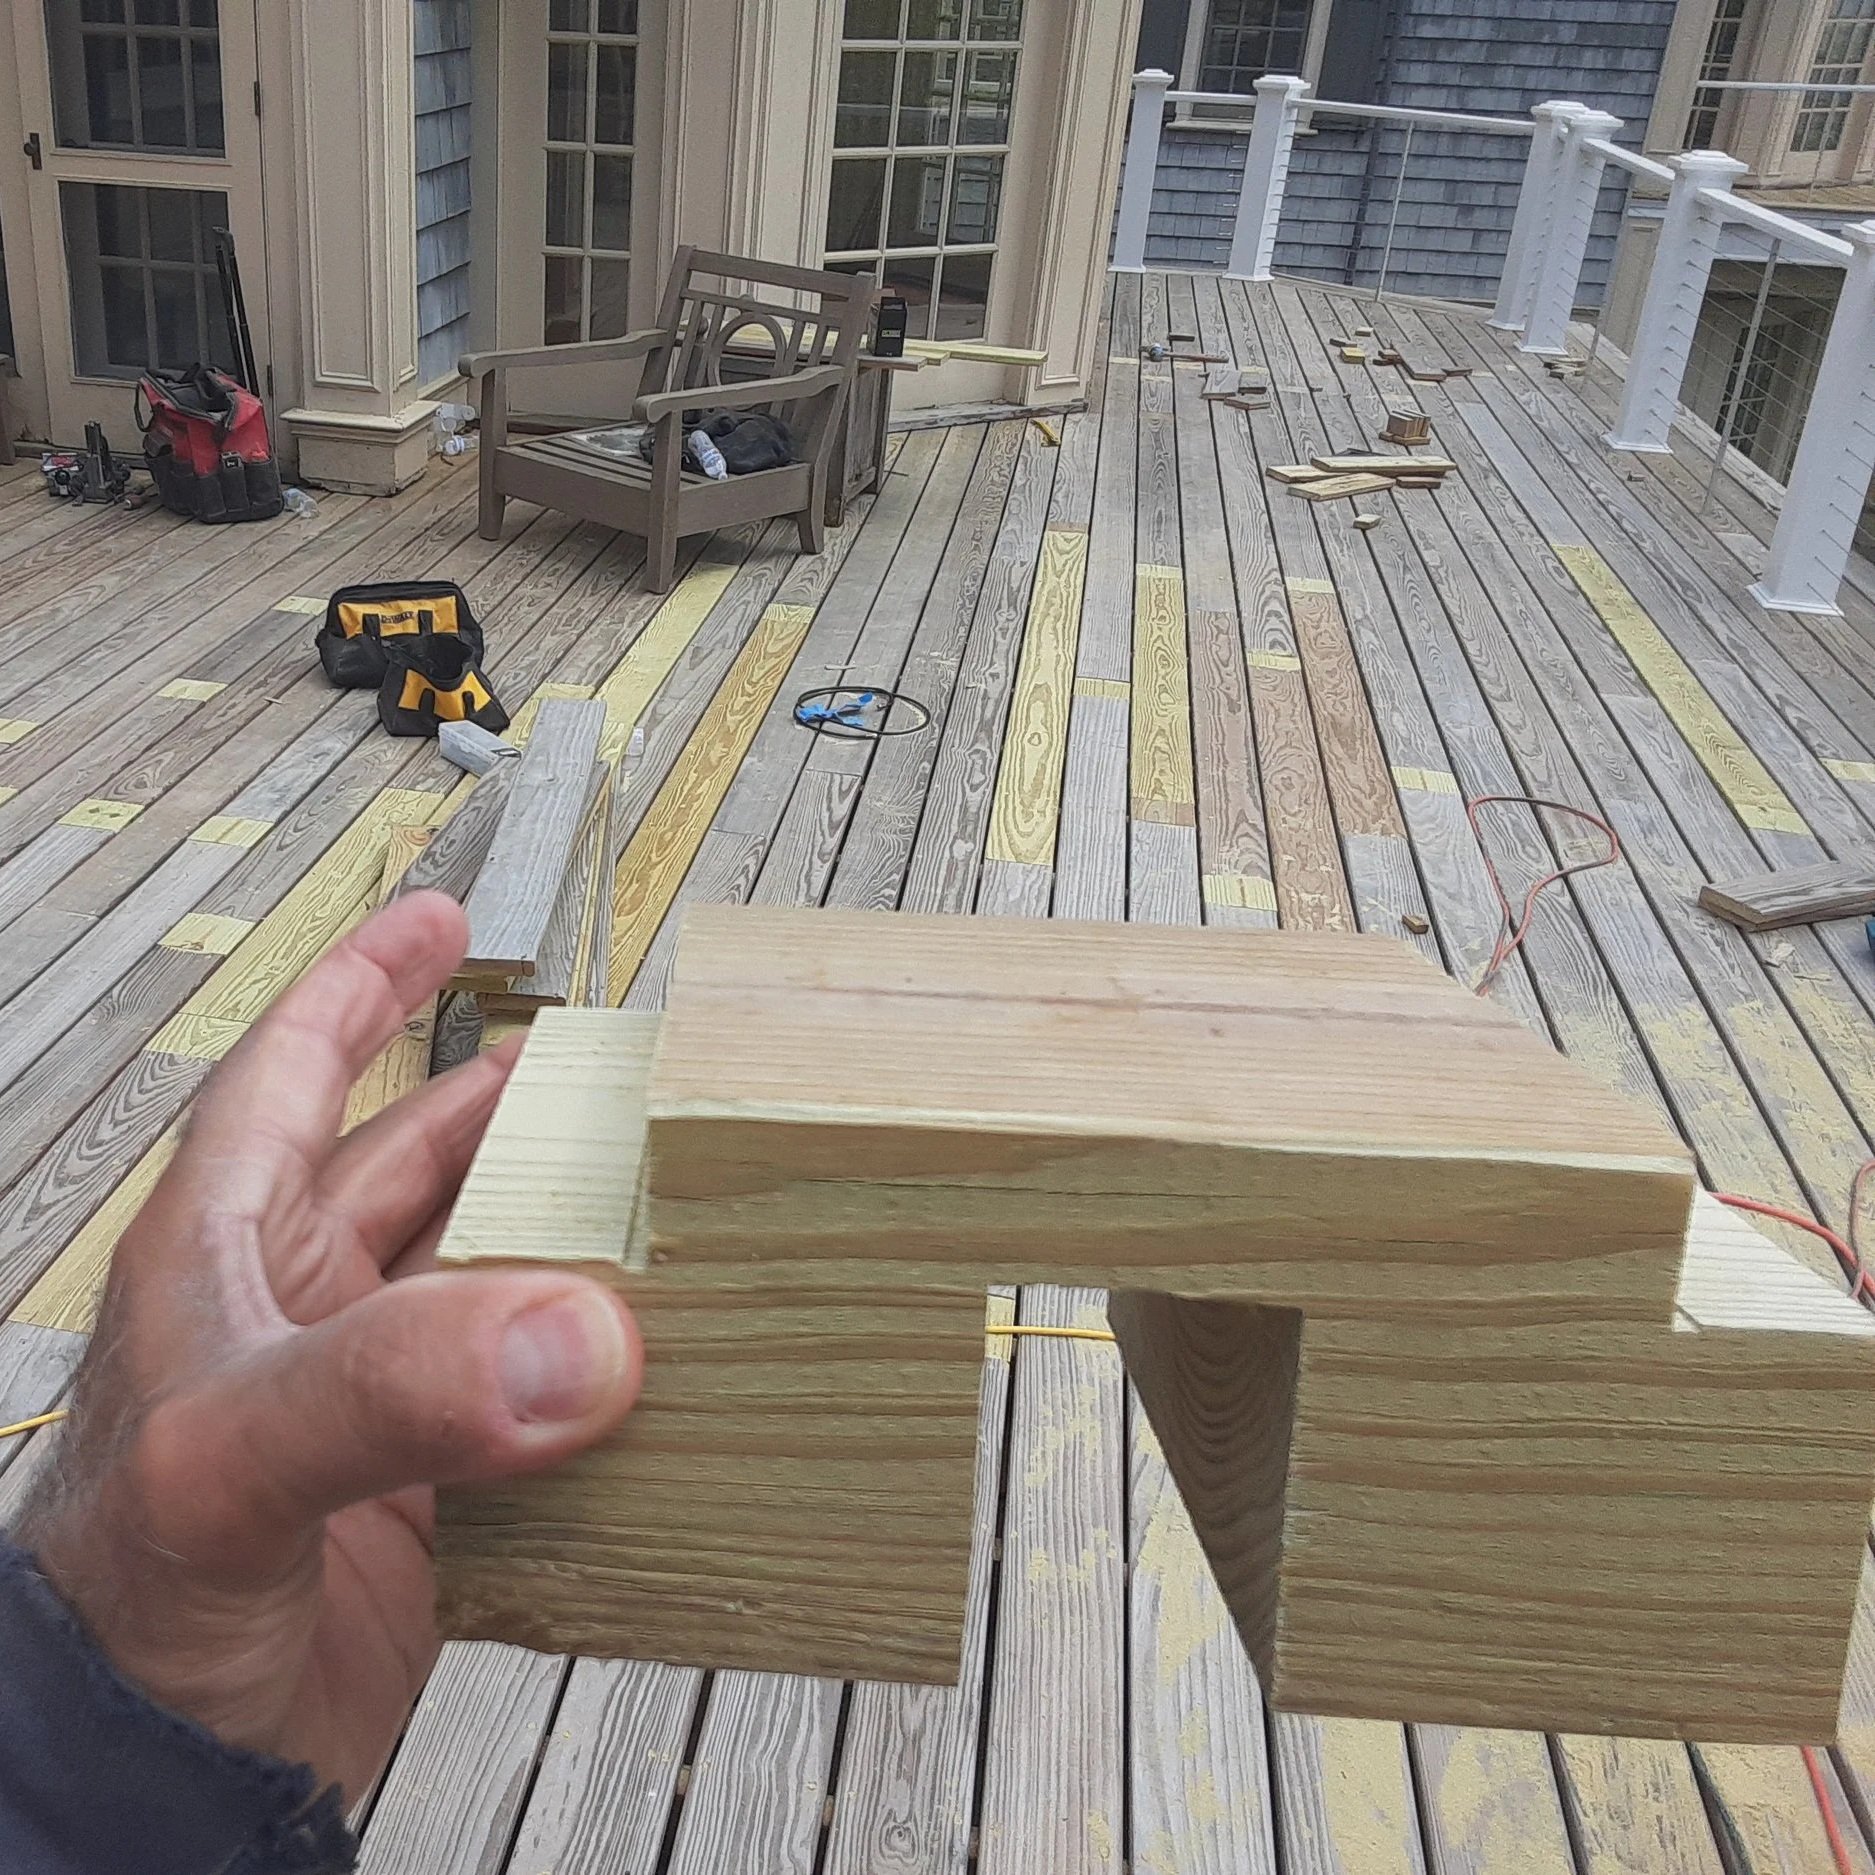
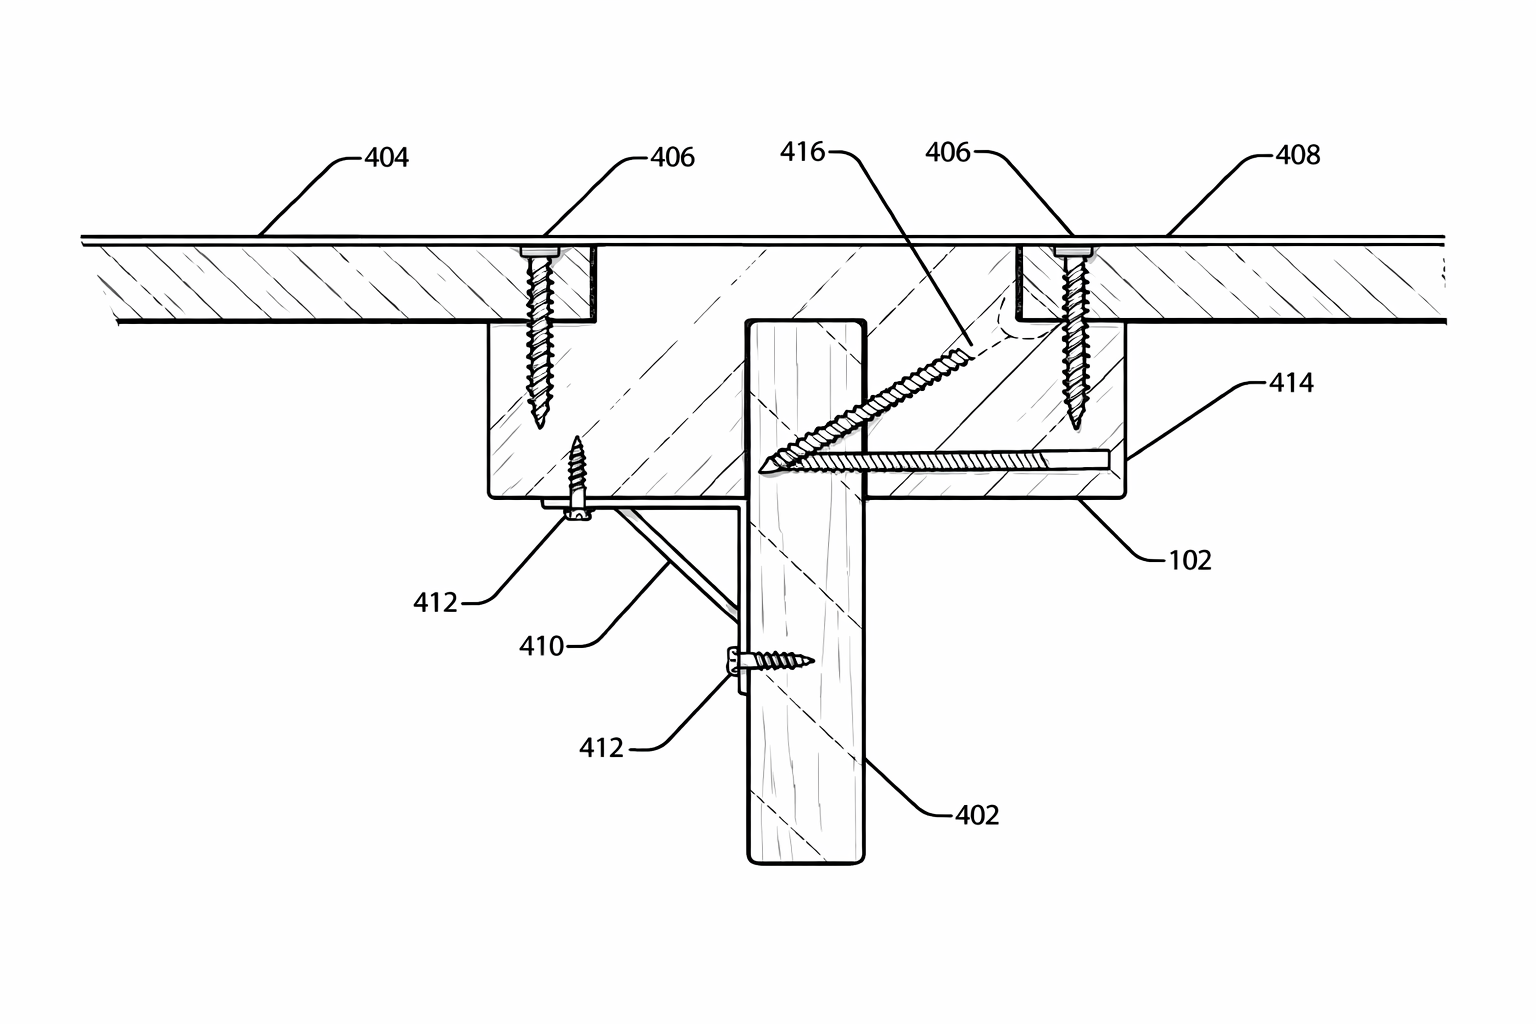
3. Install the Deck Repair Patch Block
Place the Deck Repair Patch Block over the existing joist and fasten it securely. Be sure to pre-drill holes for screws to prevent splitting the material.
4. Trim the Damaged Boards
Cut both damaged boards to size so they are ready to be reinstalled.
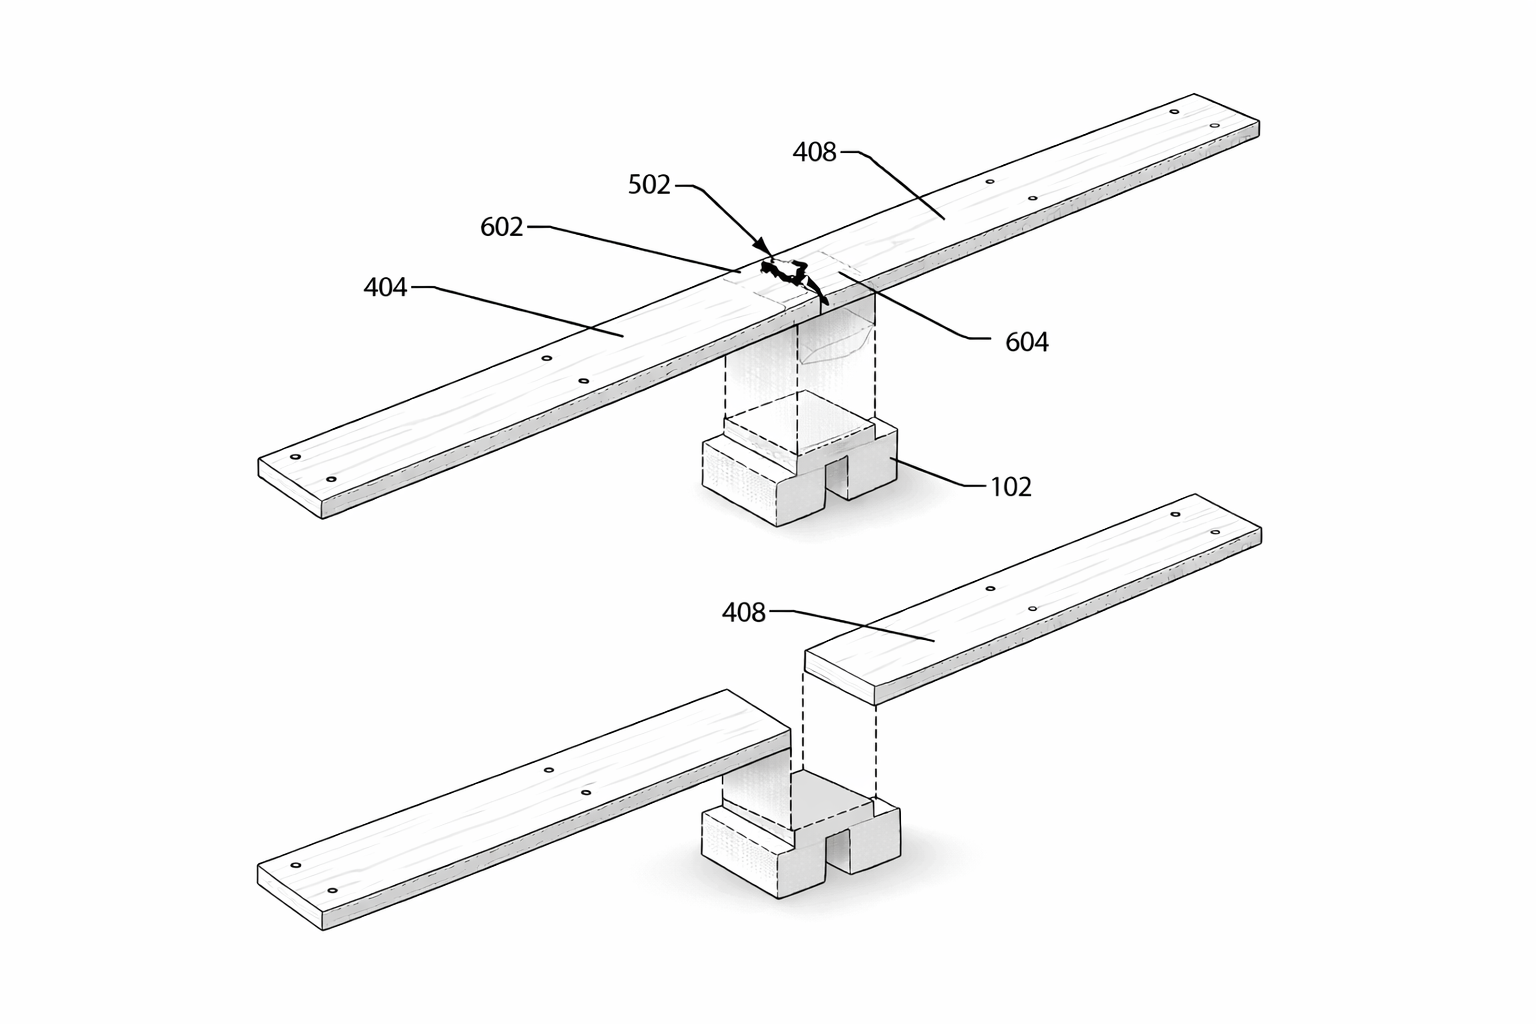
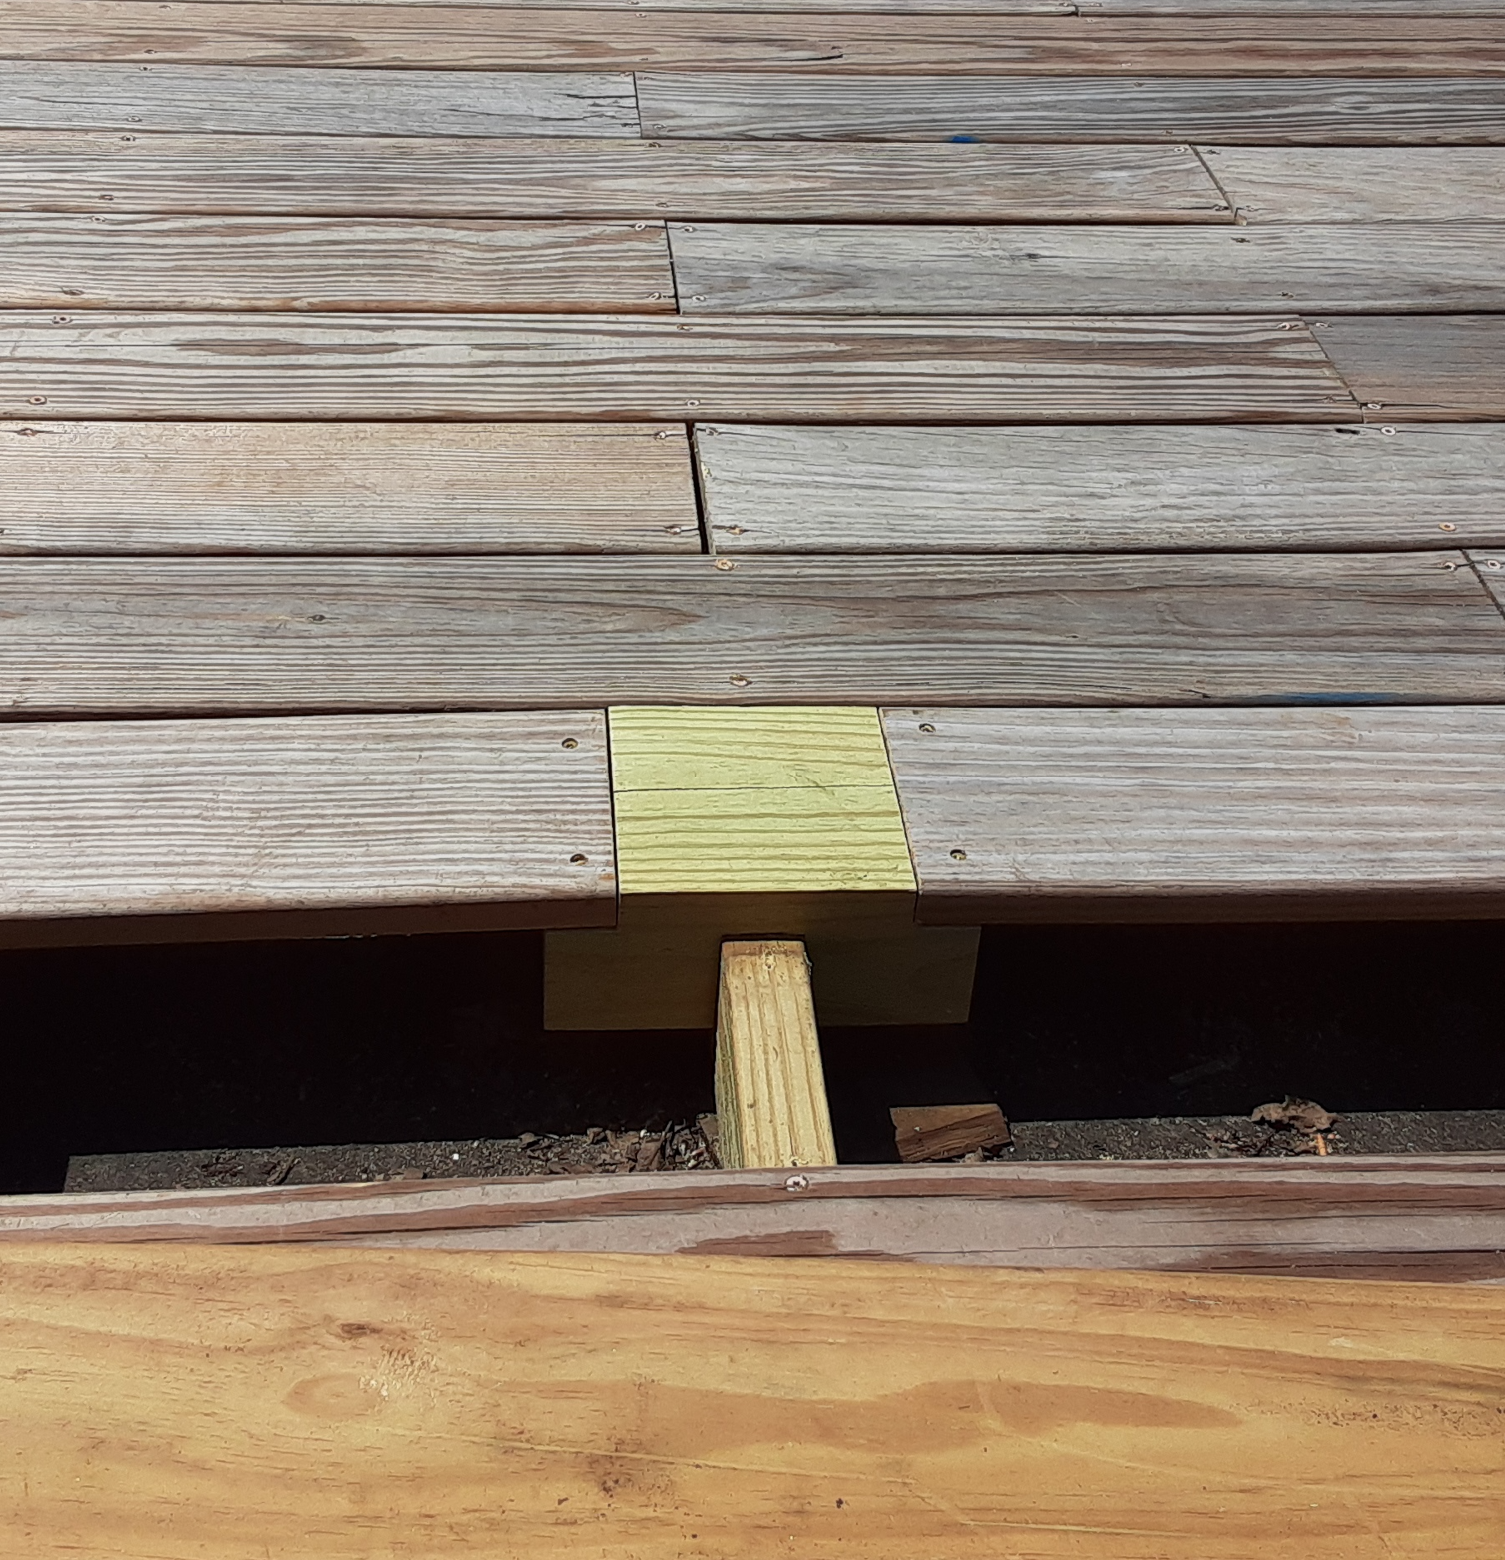
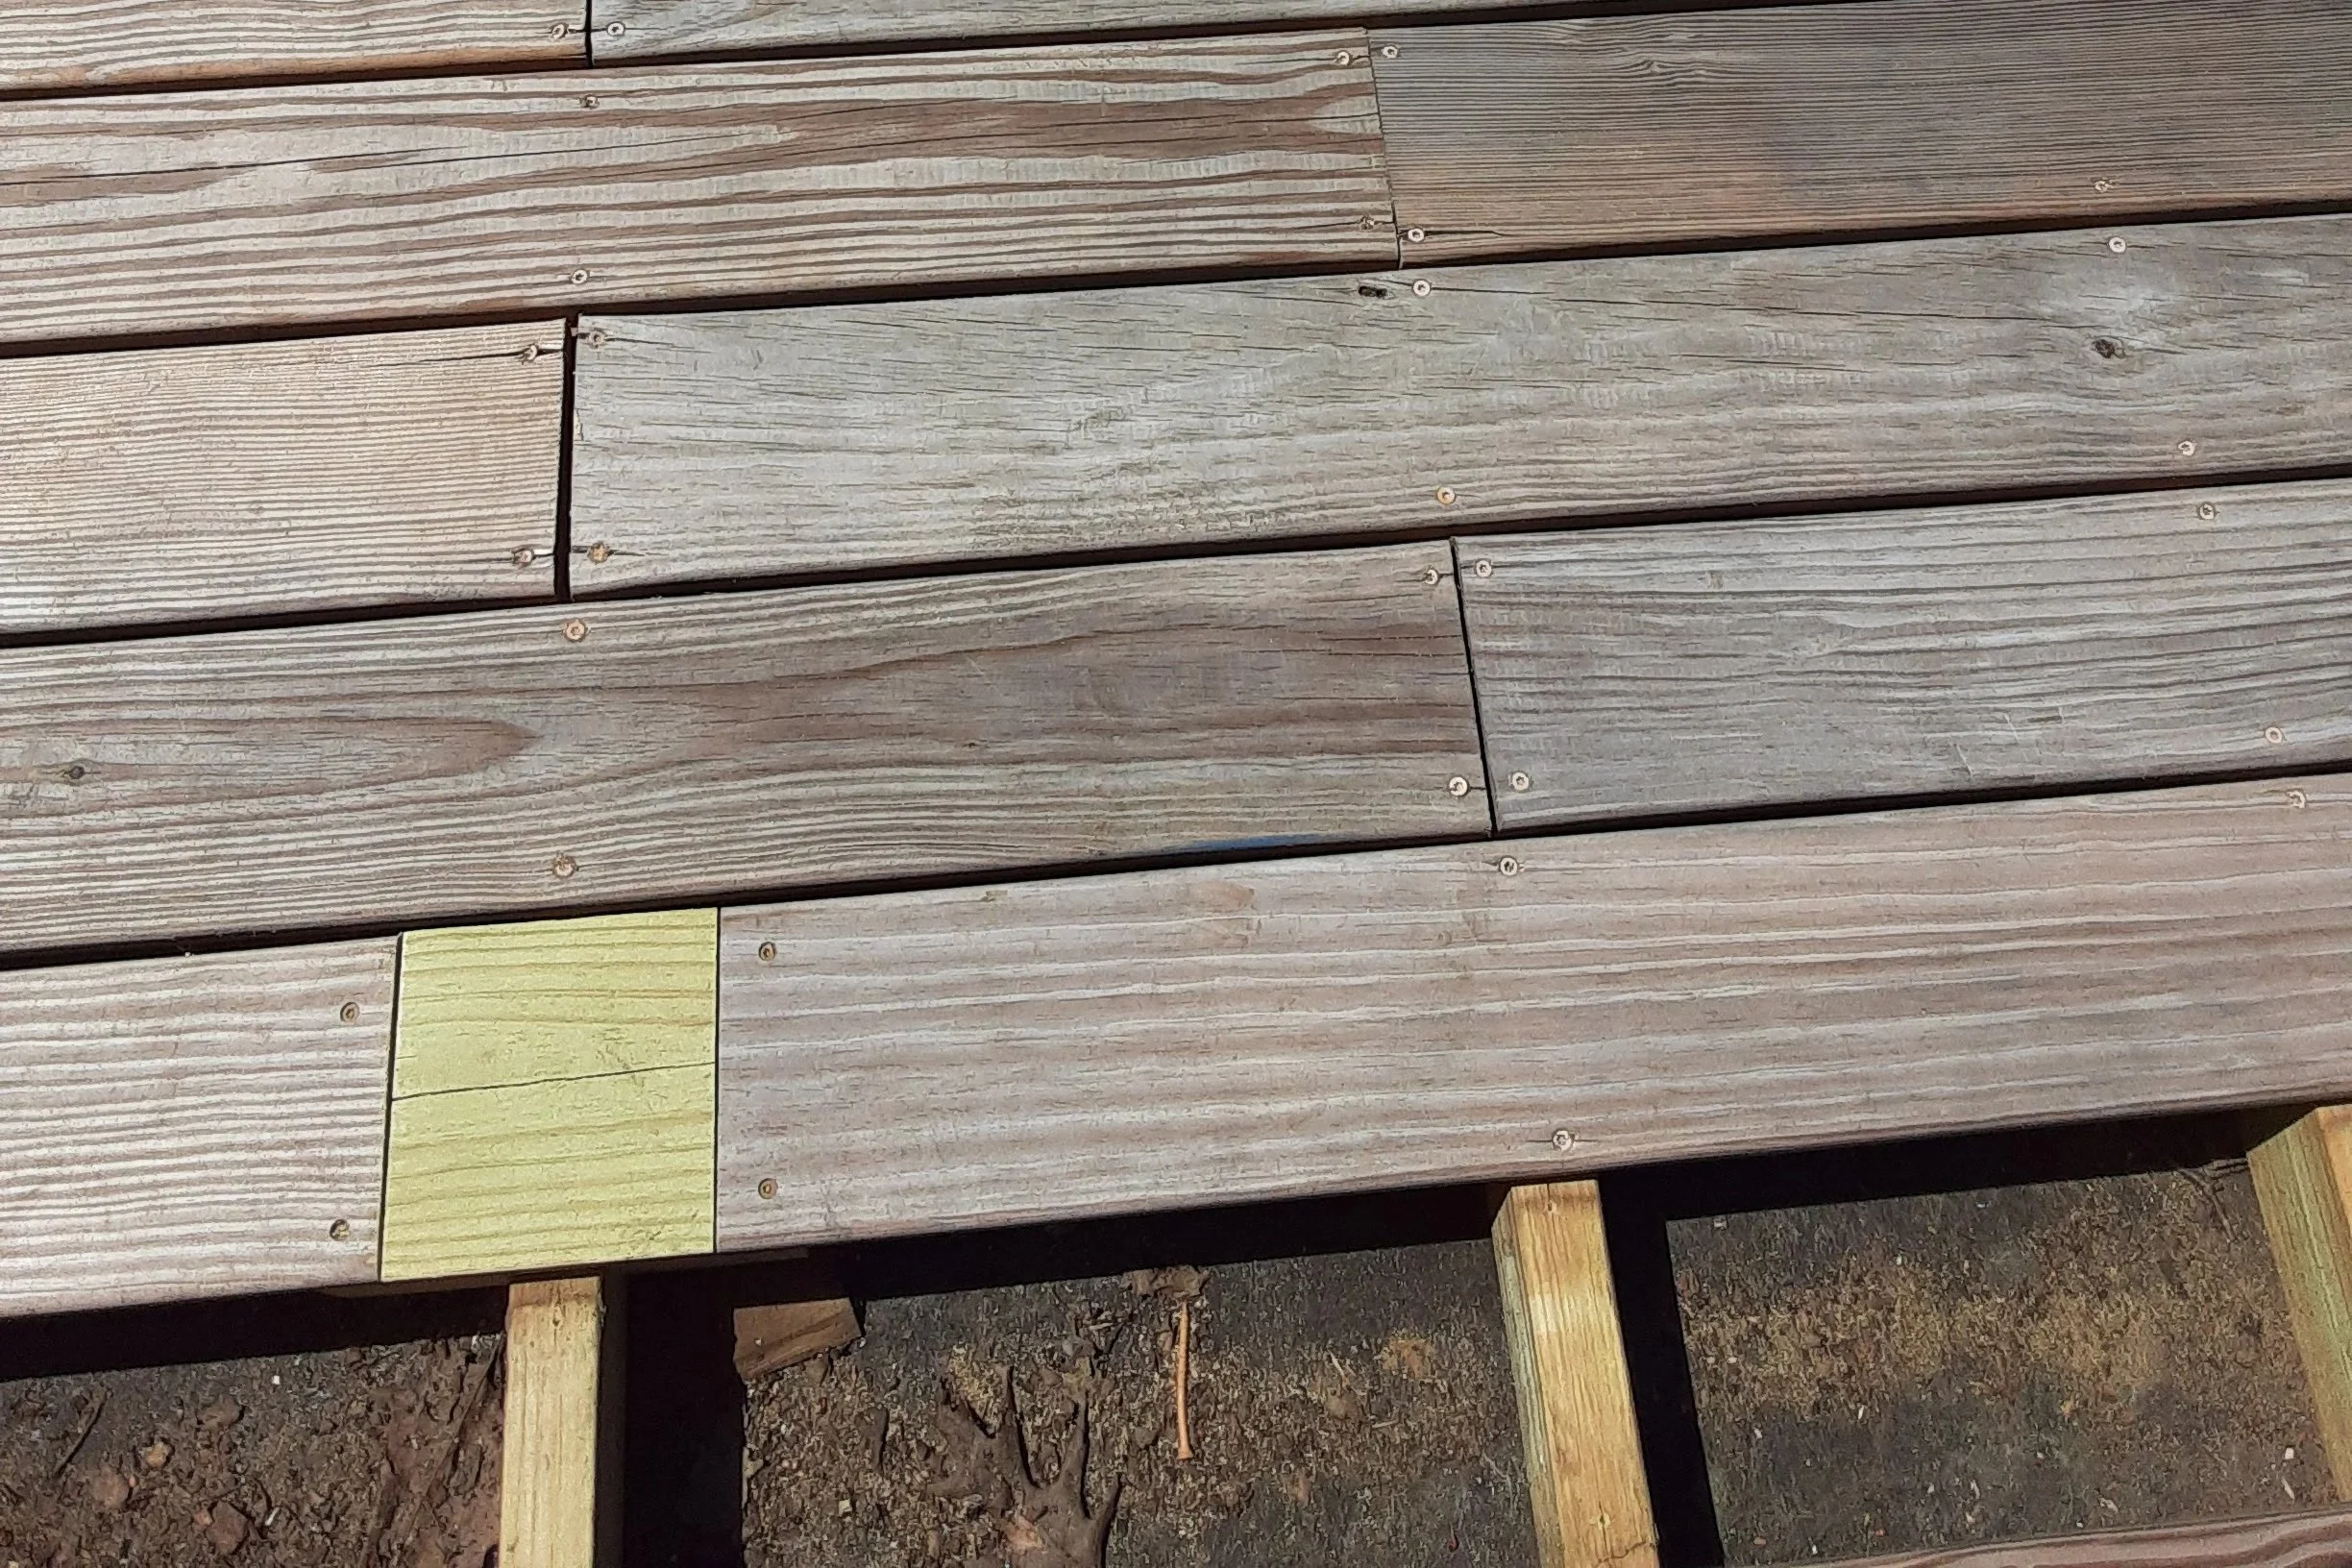
5. Reinstall and Fasten the Trimmed Boards
Set the trimmed boards onto the Deck Repair Patch Block and fasten them in place to complete the repair. Be sure to pre-drill holes for screws to prevent splitting the material.
Contact Us
Need help with product details, compatibility, or your order? Reach out using the form below and our team will respond shortly.